This guide you walk you trough setting up OpenVPN between you DD-WRT router, a laptop and a rooted Android phone so you can connect to home resources, or browse safer while on open networks, like an internet cafe.
Setting up OpenVPN is not that hard, however you may run into issues, so be patient. You will need a CA server to sign the certificates. But don't worry, any Linux machine can do that. However I would advise against doing it on the laptop that you will be using to connect remotelly in case it gets stolen or hacked.
I'm going to start with the CA server, which for me is really just a desktop at home with Ubuntu 12.04.
=> Generating the keys
1- Install OpenVPN and the OpenVPN ui for network manager
$ sudo apt-get install openvpn network-manager-openvpn
|
2- Copy the easy-rsa directory to /etc/ so it doesn't get overwritten on system updates
$ sudo -i
# mkdir /etc/openvpn/easy-rsa
# cp -r /usr/share/doc/openvpn/examples/easy-rsa/2.0/* /etc/openvpn/easy-rsa/. |
3- Edit the vars file with the parameters that you would like to use for your OpenVPN certificates. The next commands will use the variables we set here to create the certificates
# cd /etc/openvpn/easy-rsa/
# vim vars
KEY_COUNTRY= "[Two digit country. I used CA for Canada]"
KEY_PROVINCE="[Two digit province]"
KEY_CITY="[City, e.g.: Toronto]"
KEY_ORG="[Company name]"
KEY_EMAIL="[Your email address]"
KEY_EMAIL=[Your email address without double quotes] |
4- Export variables by sourcing 'vars'
In case you get the following error
**************************************************************
No /etc/openvpn/easy-rsa/openssl.cnf file could be found
Further invocations will fail
**************************************************************
|
Check your version of ssl
$ dpkg -s openssl | grep Version
Version: 1.0.1-4ubuntu5.8 |
Then check what version is in the folder
$ ll openssl*
-rw-r--r-- 1 root root 7.6K Apr 8 17:34 openssl-0.9.6.cnf
-rw-r--r-- 1 root root 8.2K Apr 8 17:34 openssl-0.9.8.cnf
-rw-r--r-- 1 root root 8.1K Apr 8 17:34 openssl-1.0.0.cnf
-rw-r--r-- 1 root root 8.1K Apr 8 17:34 openssl-1.0.0.cnf-old-copy |
Create a symbolic link to use the version in the folder that is the closest to yours
| # ln -s openssl-1.0.0.cnf openssl.cnf |
And now try to source 'vars' again
# . vars
NOTE: If you run ./clean-all, I will be doing a rm -rf on /etc/openvpn/easy-rsa/keys |
5- Delete old keys by running clean-all
6- Generate the CA keys with build-ca. The parameters that we entered in 'vars' will be populated here, all you have to do is hit enter.
# ./build-ca
Generating a 1024 bit RSA private key
...............++++++
.......++++++
writing new private key to 'ca.key'
-----
You are about to be asked to enter information that will be incorporated
into your certificate request.
What you are about to enter is what is called a Distinguished Name or a DN.
There are quite a few fields but you can leave some blank
For some fields there will be a default value,
If you enter '.', the field will be left blank.
-----
Country Name (2 letter code) [CA]:
State or Province Name (full name) [ON]:
Locality Name (eg, city) [Toronto]:
Organization Name (eg, company) [Wazem]:
Organizational Unit Name (eg, section) [changeme]:
Common Name (eg, your name or your server's hostname) [changeme]:DD-WRT
Name [changeme]:
Email Address [victor@xxxx.com]: |
7- You should now be able to see the keys
# ll keys/
total 20
drwx------ 2 root root 4096 Apr 8 17:53 ./
drwxr-xr-x 4 root root 4096 Apr 8 17:54 ../
-rw-r--r-- 1 root root 1342 Apr 8 17:53 ca.crt
-rw------- 1 root root 912 Apr 8 17:53 ca.key
-rw-r--r-- 1 root root 0 Apr 8 17:52 index.txt
-rw-r--r-- 1 root root 3 Apr 8 17:52 serial |
8- Now let's create the server keys with './build-key-server [server-name]'. When you are asked to sign and commit the certificate, enter “y”
# ./build-key-server dd-wrt
Generating a 1024 bit RSA private key
....++++++
..++++++
writing new private key to 'dd-wrt.key'
-----
You are about to be asked to enter information that will be incorporated
into your certificate request.
What you are about to enter is what is called a Distinguished Name or a DN.
There are quite a few fields but you can leave some blank
For some fields there will be a default value,
If you enter '.', the field will be left blank.
-----
Country Name (2 letter code) [CA]:
State or Province Name (full name) [ON]:
Locality Name (eg, city) [Toronto]:
Organization Name (eg, company) [Wazem]:
Organizational Unit Name (eg, section) [changeme]:
Common Name (eg, your name or your server's hostname) [dd-wrt]:
Name [changeme]:
Email Address [victor@xxxx.com]:
Please enter the following 'extra' attributes
to be sent with your certificate request
A challenge password []:
An optional company name []:Wazem
Using configuration from /etc/openvpn/easy-rsa/openssl.cnf
Check that the request matches the signature
Signature ok
The Subject's Distinguished Name is as follows
countryName :PRINTABLE:'CA'
stateOrProvinceName :PRINTABLE:'ON'
localityName :PRINTABLE:'Toronto'
organizationName :PRINTABLE:'Wazem'
organizationalUnitName:PRINTABLE:'changeme'
commonName :PRINTABLE:'dd-wrt'
name :PRINTABLE:'changeme'
emailAddress :IA5STRING:'victor@xxxx.com'
Certificate is to be certified until Apr 6 22:02:04 2023 GMT (3650 days)
Sign the certificate? [y/n]:y
1 out of 1 certificate requests certified, commit? [y/n]y
Write out database with 1 new entries
Data Base Updated |
9- Now let's create a diffie hellman key
# ./build-dh
Generating DH parameters, 1024 bit long safe prime, generator 2
This is going to take a long time
................................................................
....................................+...........................
............................+...................................
................................................................
..........................................................+.....
................................................................
............+..........++*++*++*a |
10- And finally the client keys with ./build-key [client.name]
11- You should see a new key and certificate for the new client. Create as many as you need
# ll galaxy*
total 8.0K
-rw------- 1 root root 3.9K Apr 9 05:30 galaxyS3.crt
-rw------- 1 root root 916 Apr 9 05:30 galaxyS3.key |
=> Configure router
1- Open the Admin page of DD-WRT and go to "Services => VPN"
2- Complete the following fields
Start OpenVPN - Enable
Start type - Wan Up
Public Server Cert -
Paste the contents of ca.crt
Certificate Revoke List -
Leave blank
Public Client Cert -
Paste the contents of server.crt
Private Client Key -
Paste the contents of server.key
DH PEM -
Paste the contents of dh1024.pem
OpenVPN Config -
See below
OpenVPN TLS Auth -
Leave blank
3- For the OpenVPN config, my example uses the following:
- My router has a LAN IP of 192.168.1.1
- My VPN network will be 192.168.10.0
- I'm using Open DNS as my DNS for the VPN network
push "route 192.168.1.1 255.255.255.0"
server 192.168.10.0 255.255.255.0
push "dhcp-option DNS 208.67.222.222”
dev tun0
proto udp
keepalive 10 120
dh /tmp/openvpn/dh.pem
ca /tmp/openvpn/ca.crt
cert /tmp/openvpn/cert.pem
key /tmp/openvpn/key.pem
# Only use crl-verify if you are using the revoke list, otherwise leave it commented out
# crl-verify /tmp/openvpn/ca.crl
# management parameter allows DD-WRT's OpenVPN Status web page to access the server's management port
# port must be 5001 for scripts embedded in firmware to work
management localhost 5001
Commands
# Opens firewall for incoming port 1194
iptables -I INPUT 1 -p udp --dport 1194 -j ACCEPT
# Allows connection from local VPN to the Internet
iptables -I FORWARD 1 --source 192.168.10.0/24 -j ACCEPT
# Allows connection between the local network and local VPN
iptables -I FORWARD -i br0 -o tun0 -j ACCEPT
iptables -I FORWARD -i tun0 -o br0 -j ACCEPT
4- Click on "Save" and then "Apply"
=> Client Config (Ubuntu 12.10)
1- Install OpenVPN and the OpenVPN ui for network manager
| $ sudo apt-get install openvpn network-manager-openvpn |
2- Copy the easy-rsa directory to /etc/ so it doesn't get overwritten on system updates
$ sudo -i
# mkdir /etc/openvpn/easy-rsa
# cp -r /usr/share/doc/openvpn/examples/easy-rsa/2.0/* /etc/openvpn/easy-rsa/. |
3- upload ca.crt to /etc/openvpn and run chmod 600
$ cd /etc/openvpn
# chmod 600 ca.crt
$ ll ca.crt
-rw-r--r-- 1 root root 1.4K Apr 9 05:30 ca.crt |
4- Create the client folders
| # mkdir -p /etc/openvpn/easy-rsa/keys |
5- Upload the client .crt and .key files to /etc/openvpn/easy-rsa/keys and chmod 600
$ cd /etc/openvpn/easy-rsa/keys
# chmod 600 Ubuntu.*
$ $ ll
-rw------- 1 root root 3.9K Apr 9 05:30 Ubuntu.crt
-rw------- 1 root root 916 Apr 9 05:30 Ubuntu.key |
6- Open System Settings => Network
7- Click on the plus sign on the bottom
8- Select the "VPN" interface and click on "create"
7- Select "OpenVPN" and click on create
8- Complete the fields below and click on "save"
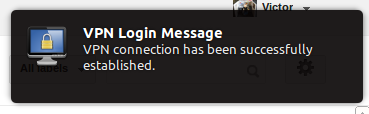
9- You should now see the VPN connection on your network manager (and it should be working)
=> Android Config
1- Install OpenVpn for Android
https://play.google.com/store/apps/details?id=de.blinkt.openvpn&hl=en
2- Create a new folder in your sdcard called openvpn
3- Connect to your android and transfer the ca.crt, client.crt and client.key
4- Open OpenVPN for Android and click on the plus sign
5- Enter a name
6- Click on Basic
7- Enter server address; change Type to "Certificates"; select the 3x files that we have uploaded; click back twice
8- You should now be able to establish a VPN connection from your phone.
=> Troubleshooting
Ubuntu Logs
You can monitor /var/log/syslog for messages while attempting to open a connection
Timezone
Check that date and time on router is the same as the computer where you created the keys. For me adding a NTP server on the router and changing it's timezone to UTC with no savings fixed my issues.
Reference:
http://www.techronicles.net/2012/12/openvpn-server-on-ubuntu-1210-with.html
http://www.howtogeek.com/64433/how-to-install-and-configure-openvpn-on-your-dd-wrt-router/
https://help.ubuntu.com/11.10/serverguide/openvpn.html
http://www.dd-wrt.com/wiki/index.php/VPN_(the_easy_way)_v24%2B